I have continued building my game and more specifically the player character sprite. Yesterday, I created a very rudimentary sprite, which was little more than a square.
Using a video from Muddy Wolf Game’s tutorial on on building a 2D platformer in Unity (Unity, 2021), I learnt how to do a really simple pixel character design, along with the animation. As I am not entirely sure what style this game will take, as I am essentially designing the game as I build, I have kept this very simple. I also decided I wanted to slightly deviate from the archetypal Martian design.
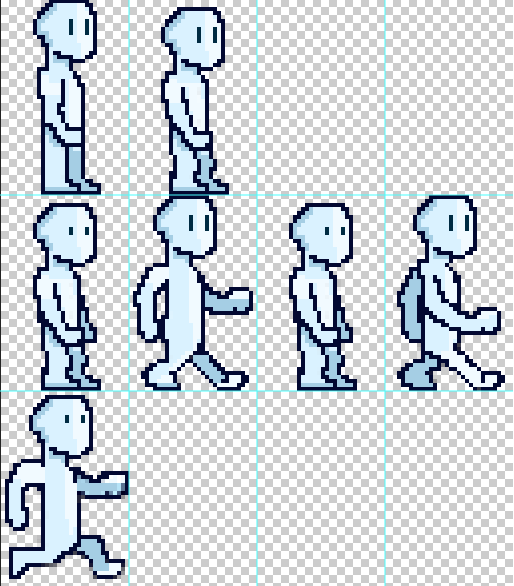
Using pixel art, which involved using a very small Photoshop canvas and a pencil tool, I drew this character (Adobe Photoshop 2021, 2021).

For the purpose of this game, I created three sets of animations – idle, run and jump. All of which speak for themselves. As I have a background in animation, as well as doing animated pixel art, I felt confident in this areas.
Once I was happy with this, I replaced the square that represented my player character in the game with my character in the idle state.

I learnt about two important windows in Unity when it comes to animating a sprite – the Animation and Animator windows. Both have very similar names but with very distinct purposes.
The Animation window is what is used to keyframe the frames of animation produced in Photoshop, as well as to control the speed of the animations.
The Animator window is what links all the animations to a sprite and triggers each animation based on a set of Parameters and their conditions.

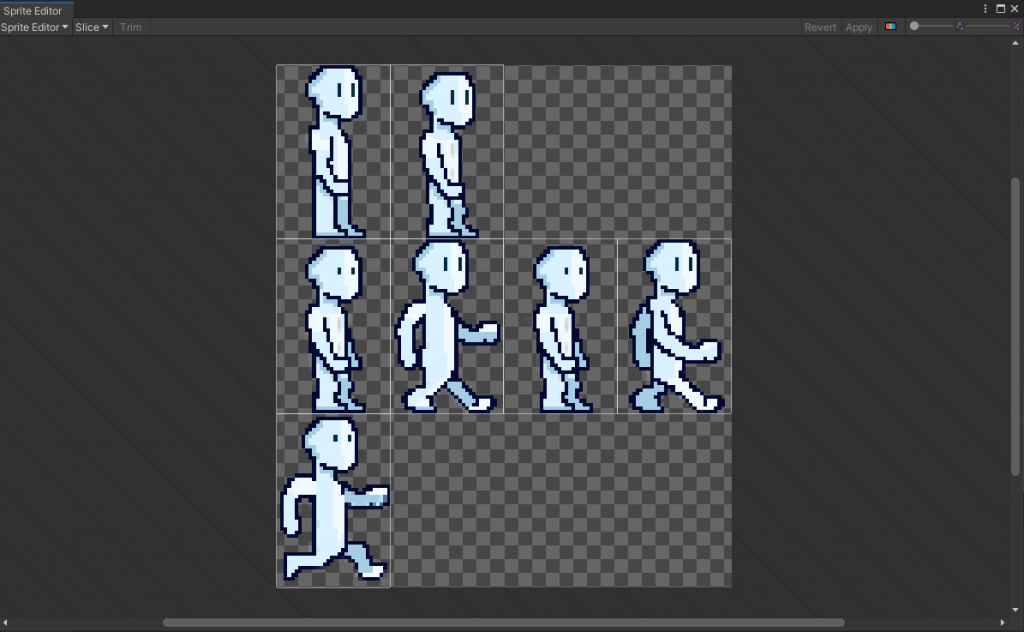
To create each set of animation, I sliced up the sprite using the sprite editor. As you can see, I drew each from in three rows according to the three sets of animations I was employing.
Once this was done, I selected each group of frames and I dragged them into my hierarchy to create animations – on for the idle movement, one for the walk/run cycle and one for jumping.
When this was done, I used the Animation window to tweak the speed of each frame and the order they ran in.

Once these animations had been compiled, I used the Animator to link them together.
I created two parameters called isGrounded and isRunning and I set several conditions which would trigger the transition between each character, such as whether the character is already standing on a surface or already running.

To define these, I needed to go into my PlayerController script and set what each of the parameters mean.
I largely copied Muddy Wolf Game’s script, which I do not always consider the best practice on my part. However, I made sure that I used comments to annotate the code so that I understood exactly what each part does.
using System.Collections;
using System.Collections.Generic;
using UnityEngine;

public class PlayerController : MonoBehaviour
{
    public float moveSpeed = 5f; //Controls speed of player character
    public bool isGrounded = false; // boolean to determine whether the player character is touching the ground.  The player falls into the map, so this is false by default.
    public Animator anim;


    float mx;

    // Start is called before the first frame update
    void Start()
    {

    }

    // Update is called once per frame
    void Update()
    {
        mx = Input.GetAxisRaw("Horizontal"); //the player character's movement along the X axis or horizontal axis,

        Jump();
        Vector3 movement = new Vector3(Input.GetAxis("Horizontal"), 0f, 0f);
        transform.position += movement * Time.deltaTime * moveSpeed;

        if (Mathf.Abs(mx) > 0.05)
        {
            anim.SetBool("isRunning", true); // if the player character is moving alomg the X axis, the isRunning attribute is true
        }
        else
        {
            anim.SetBool("isRunning", false); //if the player character is idle, the isRunning attribute is false
        }

        if (mx > 0f)
        {
            transform.localScale = new Vector3(1f, 1f, 1f);//if the player character is moving to the right, the size of the sprite remains as it is.
        } else if (mx < 0f)
        {
            transform.localScale = new Vector3(-1f, 1f, 1f); //if the player character is moving to the left, the X axis is set to -1, which flips the sprite around.
        }

        anim.SetBool("isGrounded", isGrounded); //set to define that the isGrounded parameter sets back to true, once the character hits the ground

    }

    void Jump() //if the character is on the ground, it can jump.  If already jumping, it cannot jump further.
    {
        if (Input.GetButtonDown("Jump") && isGrounded == true) {
        gameObject.GetComponent<Rigidbody2D>().AddForce(new Vector2(0f, 10f), ForceMode2D.Impulse);
        }
    }


}
Once i had done this, I tested the game and I found that the animation worked but the character would often spin on its axis when it collided with the platforms. To fix this, I used a component I learnt about during the development of my as of yet incomplete Pong/Breakout game, which was to apply a Rotation Constraint which would lock the rotation in place.
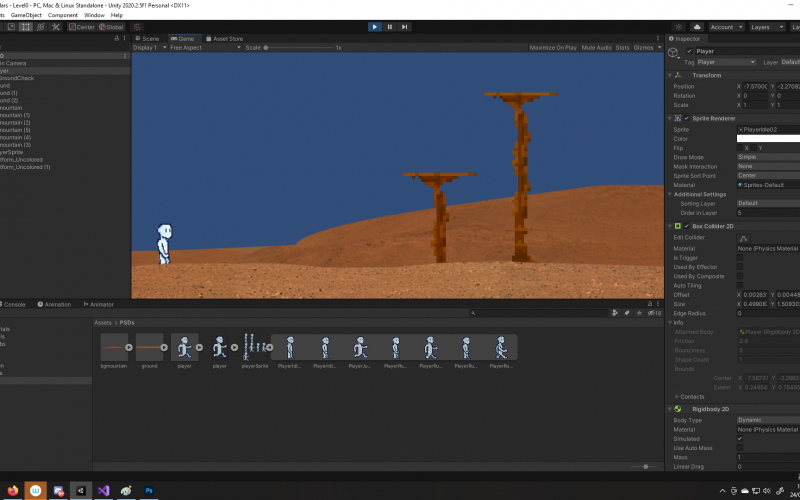
Now this has been done, here is how the character looks in my game.
So far its good. The animation is very blocky compared to what I am used to but this is a feature I would like to tweak if I have enough time between when I am satisfied with the working prototype and the deadline of this rapid ideation session, which is exactly one week from now.
My next set of action will be to either read up or watch videos on good level design and the best way to approach this. I am tossing up whether this game will consist of one long level or if it will have multiple levels. While I am keen on the latter, I need to take the time contsraints into consideration.
I may continue to use Muddy Wolf Game, but I am also considering looking at other sources too.
To build my player sprite, I used two different game development YouTuber’s videos to do this, which meant that I learnt about how different developers apply different techniques to execute the same concept. The advantage of this is that I have a richer learning experience but the potential downside is that can mean that some of the information is contradictory and that I may spend more time deciphering how it works.
References
Adobe. 2021. Adobe Photoshop 2021 (2021). [Software]
Muddy Wolf Games, 2020. 2D Platformer in Unity.
Unity Technologies. 2021. Unity (2021). [Software]
